Connect JTracking to Google Ads

This guide explains how to integrate JTracking with Google Ads to ensure your conversion data is reported accurately and consistently.
Overview
JTracking connects your key user behavior data to Google Ads by configuring tags in Google Tag Manager (GTM). This allows more accurate and enriched conversion data to be sent to Google Ads.
The core logic is simple:
you associate a tracking event generated by JTracking with a corresponding Google Ads Conversion Action, enabling reliable conversion reporting for your ad campaigns.
This guide is divided into three parts:
- How to configure Google Ads integration in JTracking
- How to retrieve the Conversion ID and Label from an existing Google Ads Conversion Action
- How to create a new Google Ads Conversion Action and obtain its Conversion ID and Label
Important Notes
If you connect existing Conversion Actions, make sure that no other tools are sending data to the same Conversion Action. Otherwise, duplicate conversions may occur.
Recommended Best Practice
Create a dedicated Conversion Action for JTracking and use it for comparison.
For example, if you already have a Purchase Conversion Action, you can create a new one named Purchase_JTracking specifically for JTracking.
1. Google Ads Integration Setup in JTracking
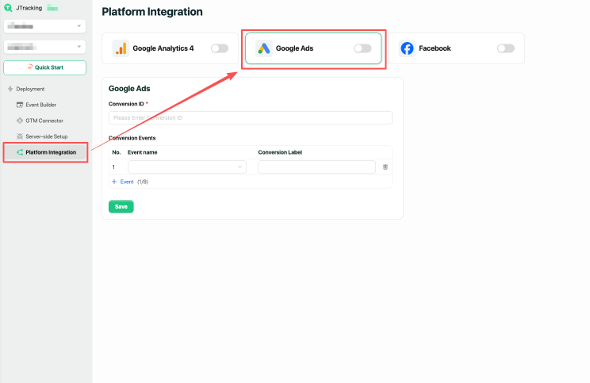
Step 1. Navigate to Platform Integration and select the Google Ads Connector.
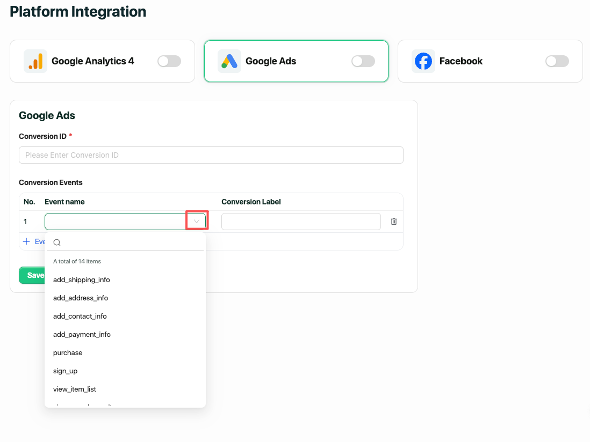
Step 2. Enter the Conversion ID. (How to obtain the Conversion ID is explained in Section 2 and Section 3.)
Step 3. Configure the Conversion Event. Select the event you want to send to Google Ads from the event list.
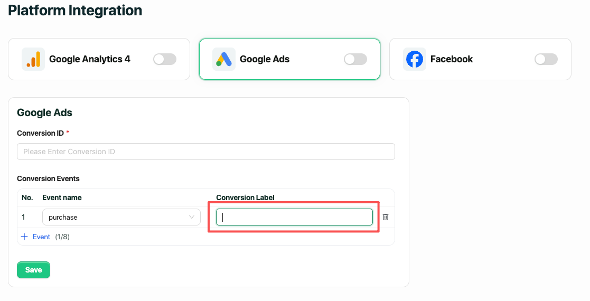
Step 4. Enter the corresponding Conversion Label from Google Ads.
Step 5. Click “+ Event” and repeat Step 3–Step 4 to add additional events if needed.
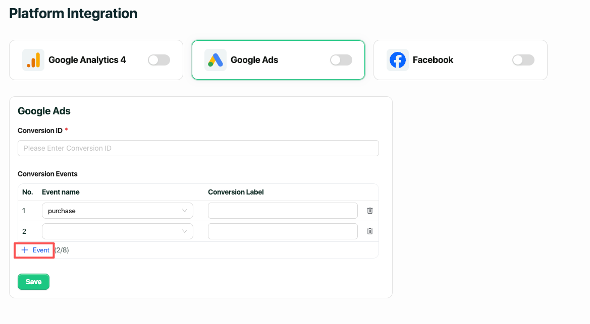
Step 6. After configuring all Conversion Events, click “Save” to apply the settings.
2. Retrieve Conversion ID and Label from an Existing Google Ads Conversion Action
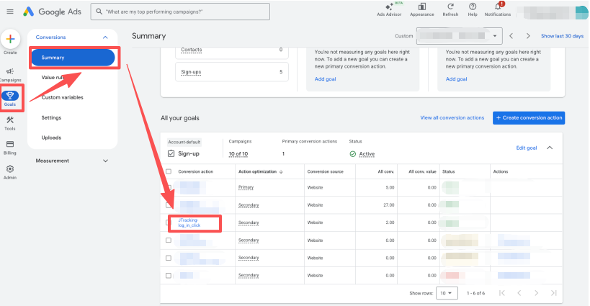
Step 1. Log in to your Google Ads account. Go to Goals from the left-side menu.
Click the Conversion Action you want to use.
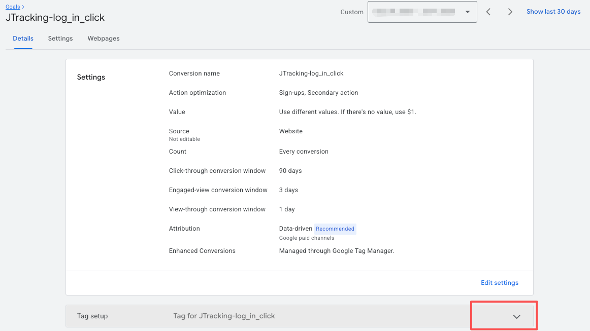
Step 2. In the Tag setup section, click the arrow icon to expand the details.
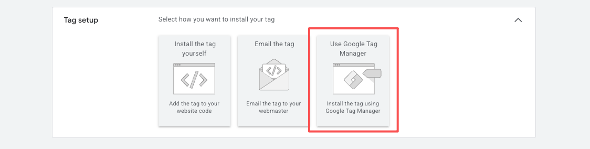
Select “Use Google Tag Manager.”
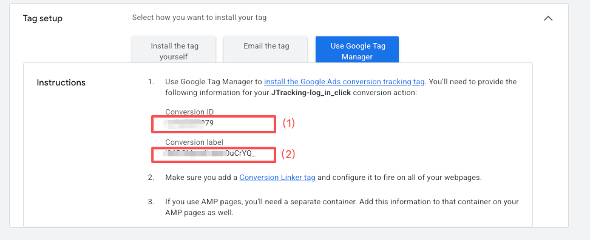
Step 3. Copy the Conversion ID (1) and Conversion Label (2), then paste them into the corresponding fields in JTracking.
3. Create a New Google Ads Conversion Action and Get Conversion ID & Label
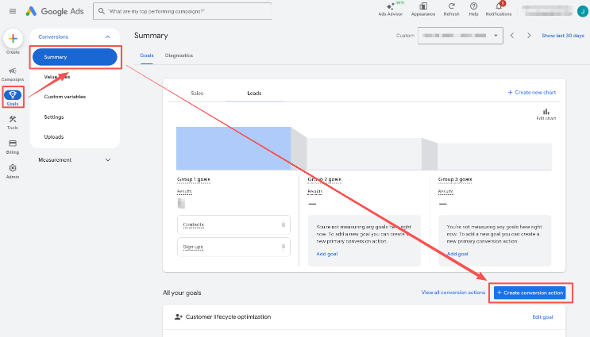
Step 1. Log in to your Google Ads account. Go to Goals → Summary → Create conversion action.
Step 2. Select “Conversions on a website” and enter your website URL.
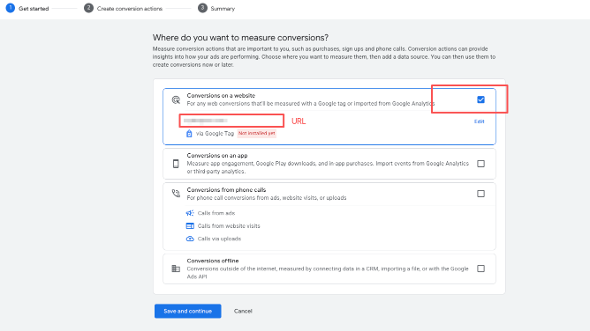
If a new window appears, click “Scan”, select “Google tag”, then click “Done.”

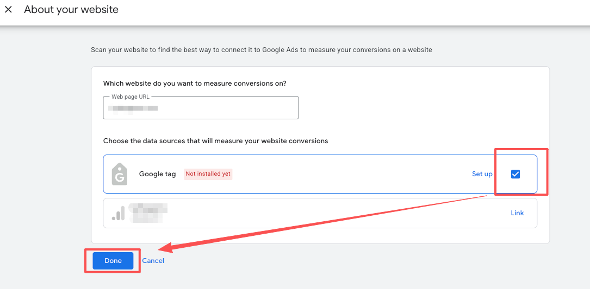
After that, click “Save and Continue.”
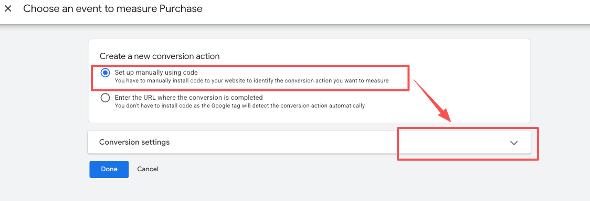
Step 3. Choose a conversion category (e.g., Purchase or another relevant option).
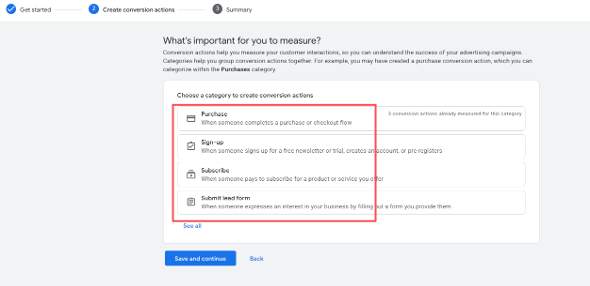
In the pop-up window:
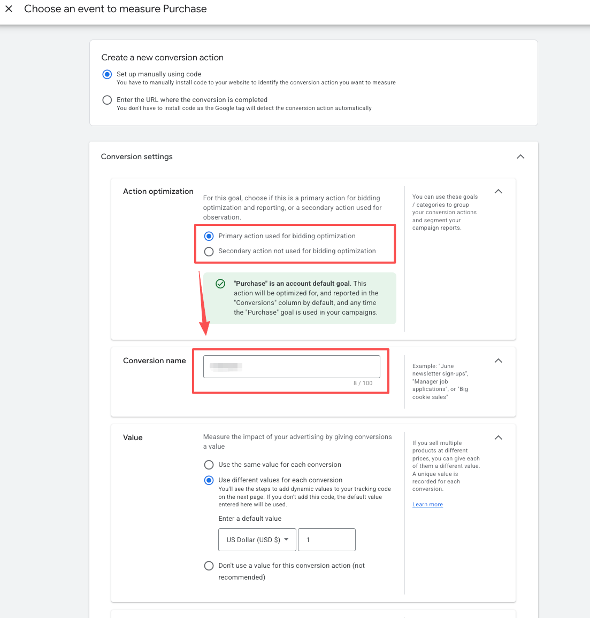
- Select “Set up manually using code”
- Expand Conversion settings by clicking the arrow icon
- Adjust settings such as Action optimization or Conversion name if needed
- Click “Done”
After closing the pop-up, click “Save and Continue.”
Step 4. In the section “1. Set up your Google tag and event tags”, choose“Use Google Tag Manager.”
Copy the Conversion ID (1) and Conversion Label (2),and paste them into the corresponding fields in JTracking.
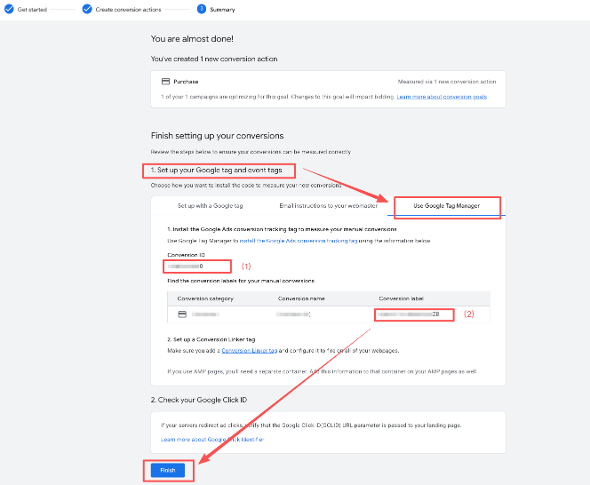
Click “Finish.”