Connect JTracking to Meta

This guide explains how to configure Meta (Facebook) Platform Integration in JTracking to send events to Meta Pixel and Meta Conversions API (CAPI) for conversion tracking and ad attribution.
Overview
JTracking integrates with Meta by sending event data through:
- Meta Pixel (browser events)
- Meta Conversions API (server events)
Using both browser and server signals enables Meta to deduplicate events and improve conversion measurement reliability.
Prerequisites
Before setting up Meta Platform Integration in JTracking, ensure the following requirements are met.
- Meta Pixel. If you do not already have a Pixel, follow how to set up the Meta Pixel to create one.
- Meta Business Permissions. You must have Admin or Developer access to the Meta business porfolio that owns the Pixel. If you do not have one, follow how to create a business portfolio in Meta.
Avoid Duplicate Event Tracking (Important)
Before enabling Meta Platform Integration in JTracking, ensure that no other tools are sending the same events to the same Meta Pixel.
Duplicate tracking may occur if:
- Existing GTM tags send events to Meta
- Shopify native app Facebook & Instagram is enabled
- Other tracking tools send events to the same Pixel
So, if your store is running on Shopify and you had the Facebook & Instagram app installed before using JTracking, please disable Meta data sharing in Shopify:
Go to Shopify Admin → Sales Channels → Facebook & Instagram → Settings → Share Data → Change, then toggle Data Sharing to Off.
Highly recommended: If you want to keep your existing tracking setup, create a separate Meta Pixel specifically for JTracking. This allows JTracking to run in parallel with your current configuration without causing any interference. Follow how to set up the Meta Pixel to set up a new Pixel.
Meta Platform Integration Setup
Step 1. Navigate to Platform Integration,and Select Facebook Connector
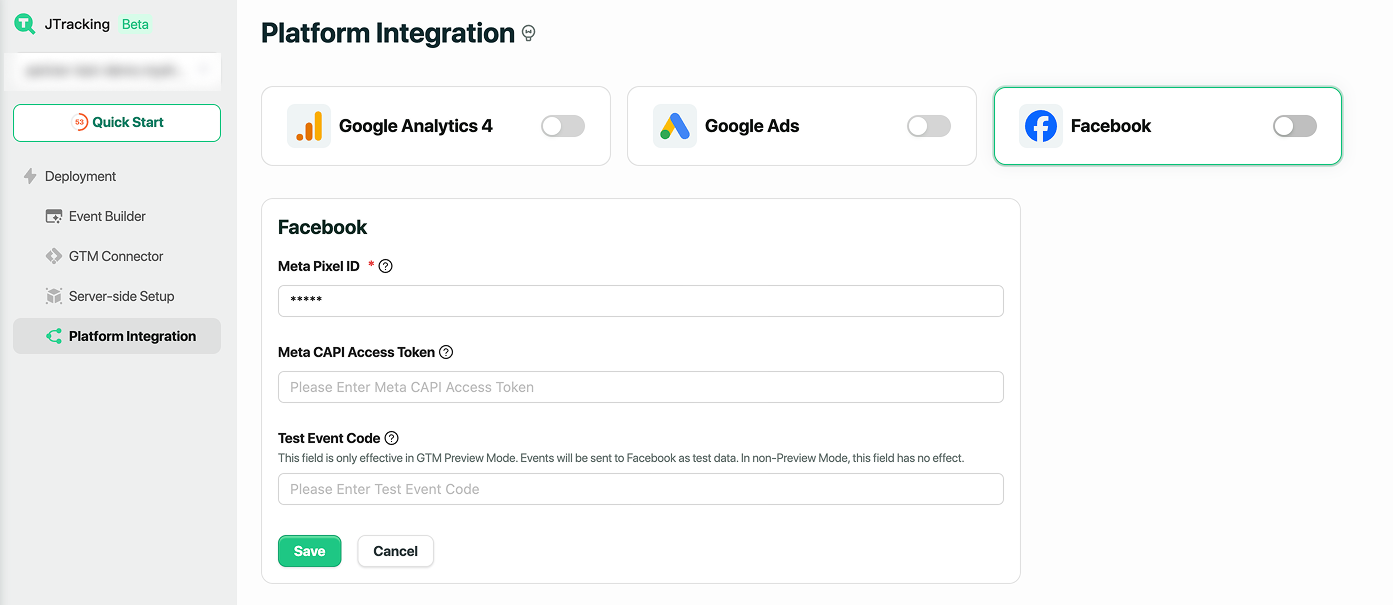
Step 2. Provide the Meta Pixel ID and Conversion API Access Token( the Test ID is optional)
- Meta Pixel ID:
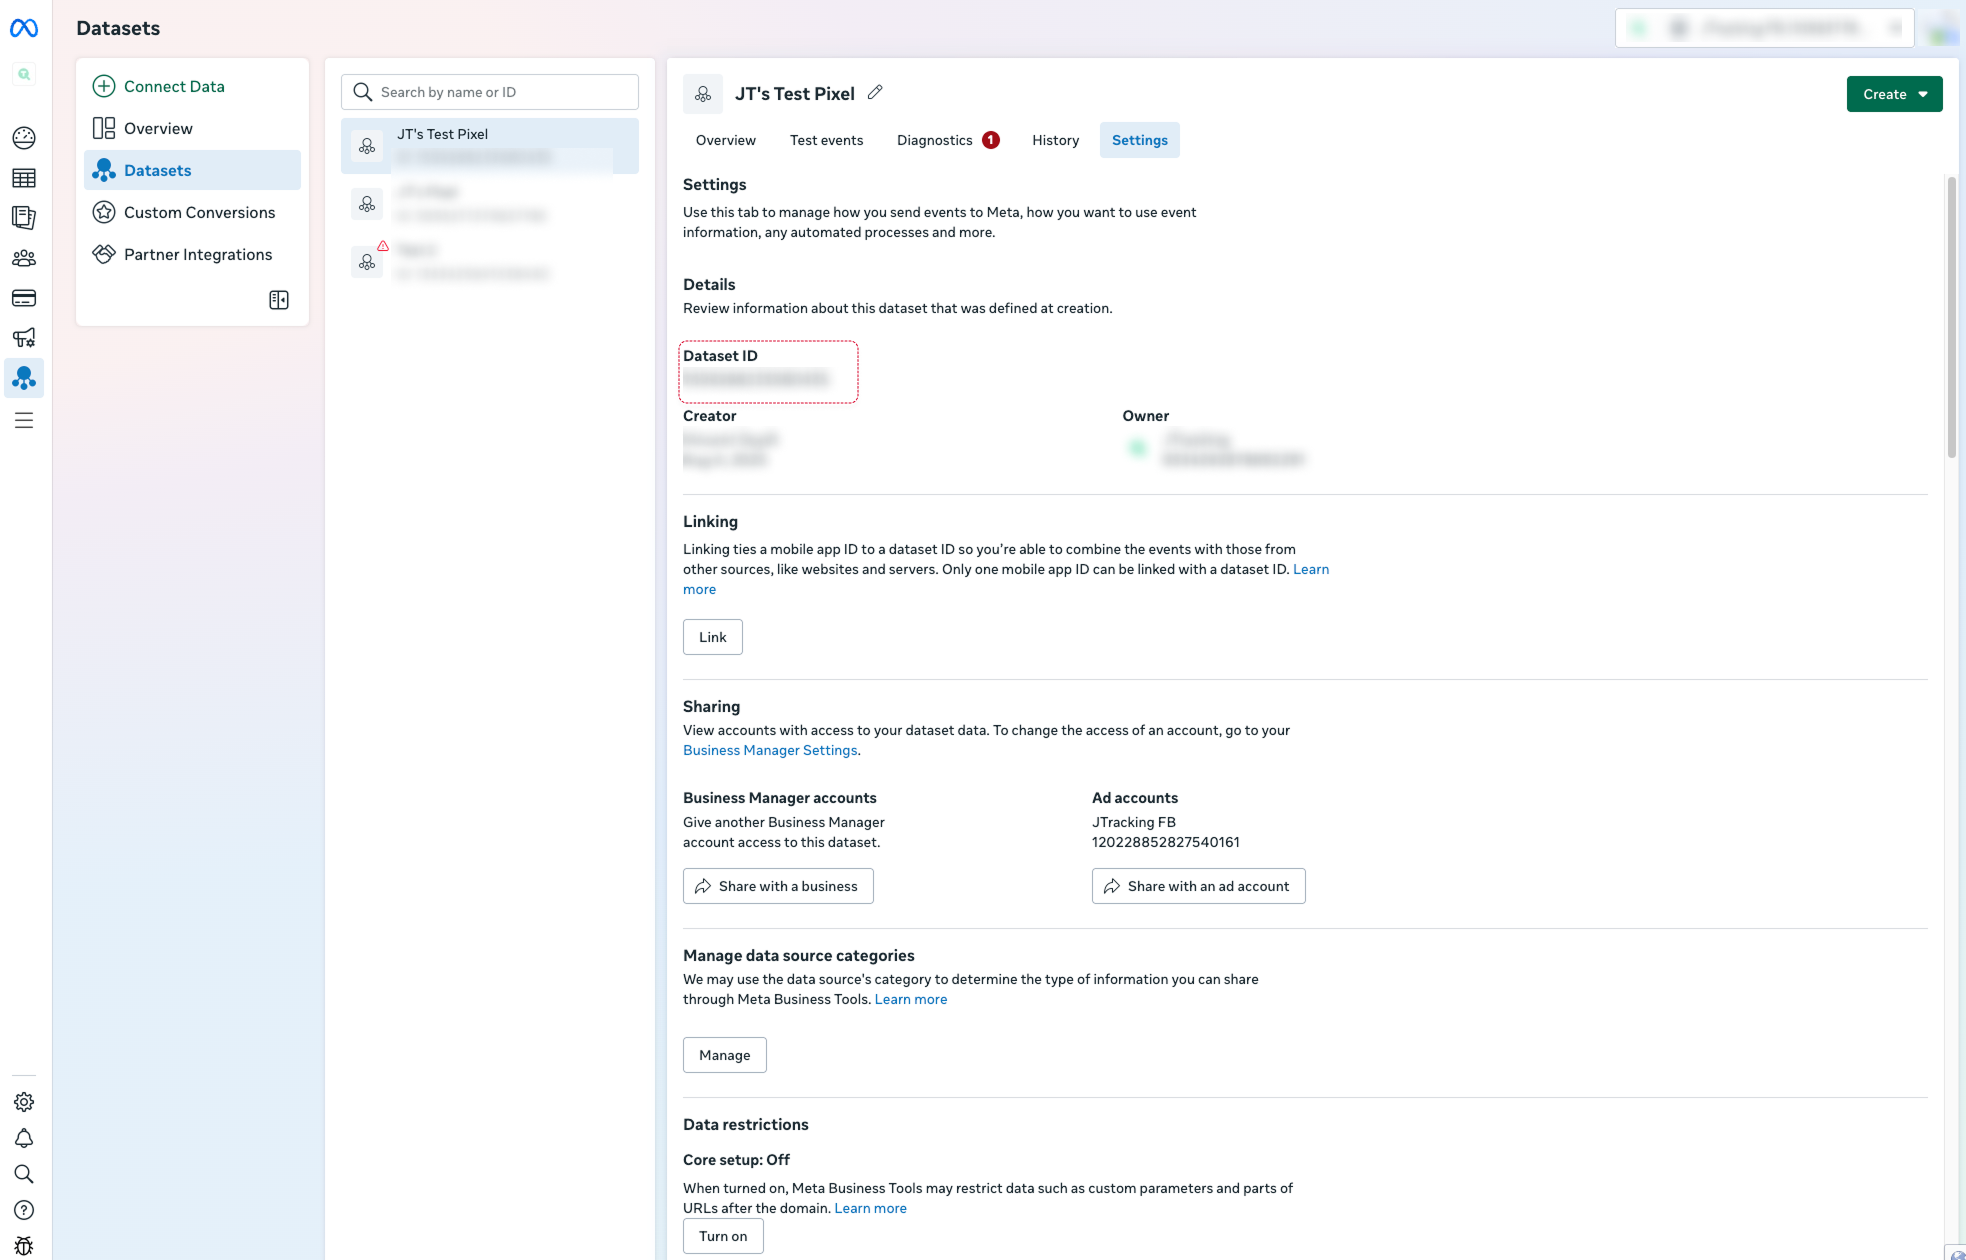
- Open Meta Event Manager
- Select Data Sources, then choose the Pixel you want to use.
- In the Pixel Settings tab, copy the
Pixel IDand paste it into JTracking. - Meta Conversion API Access Token
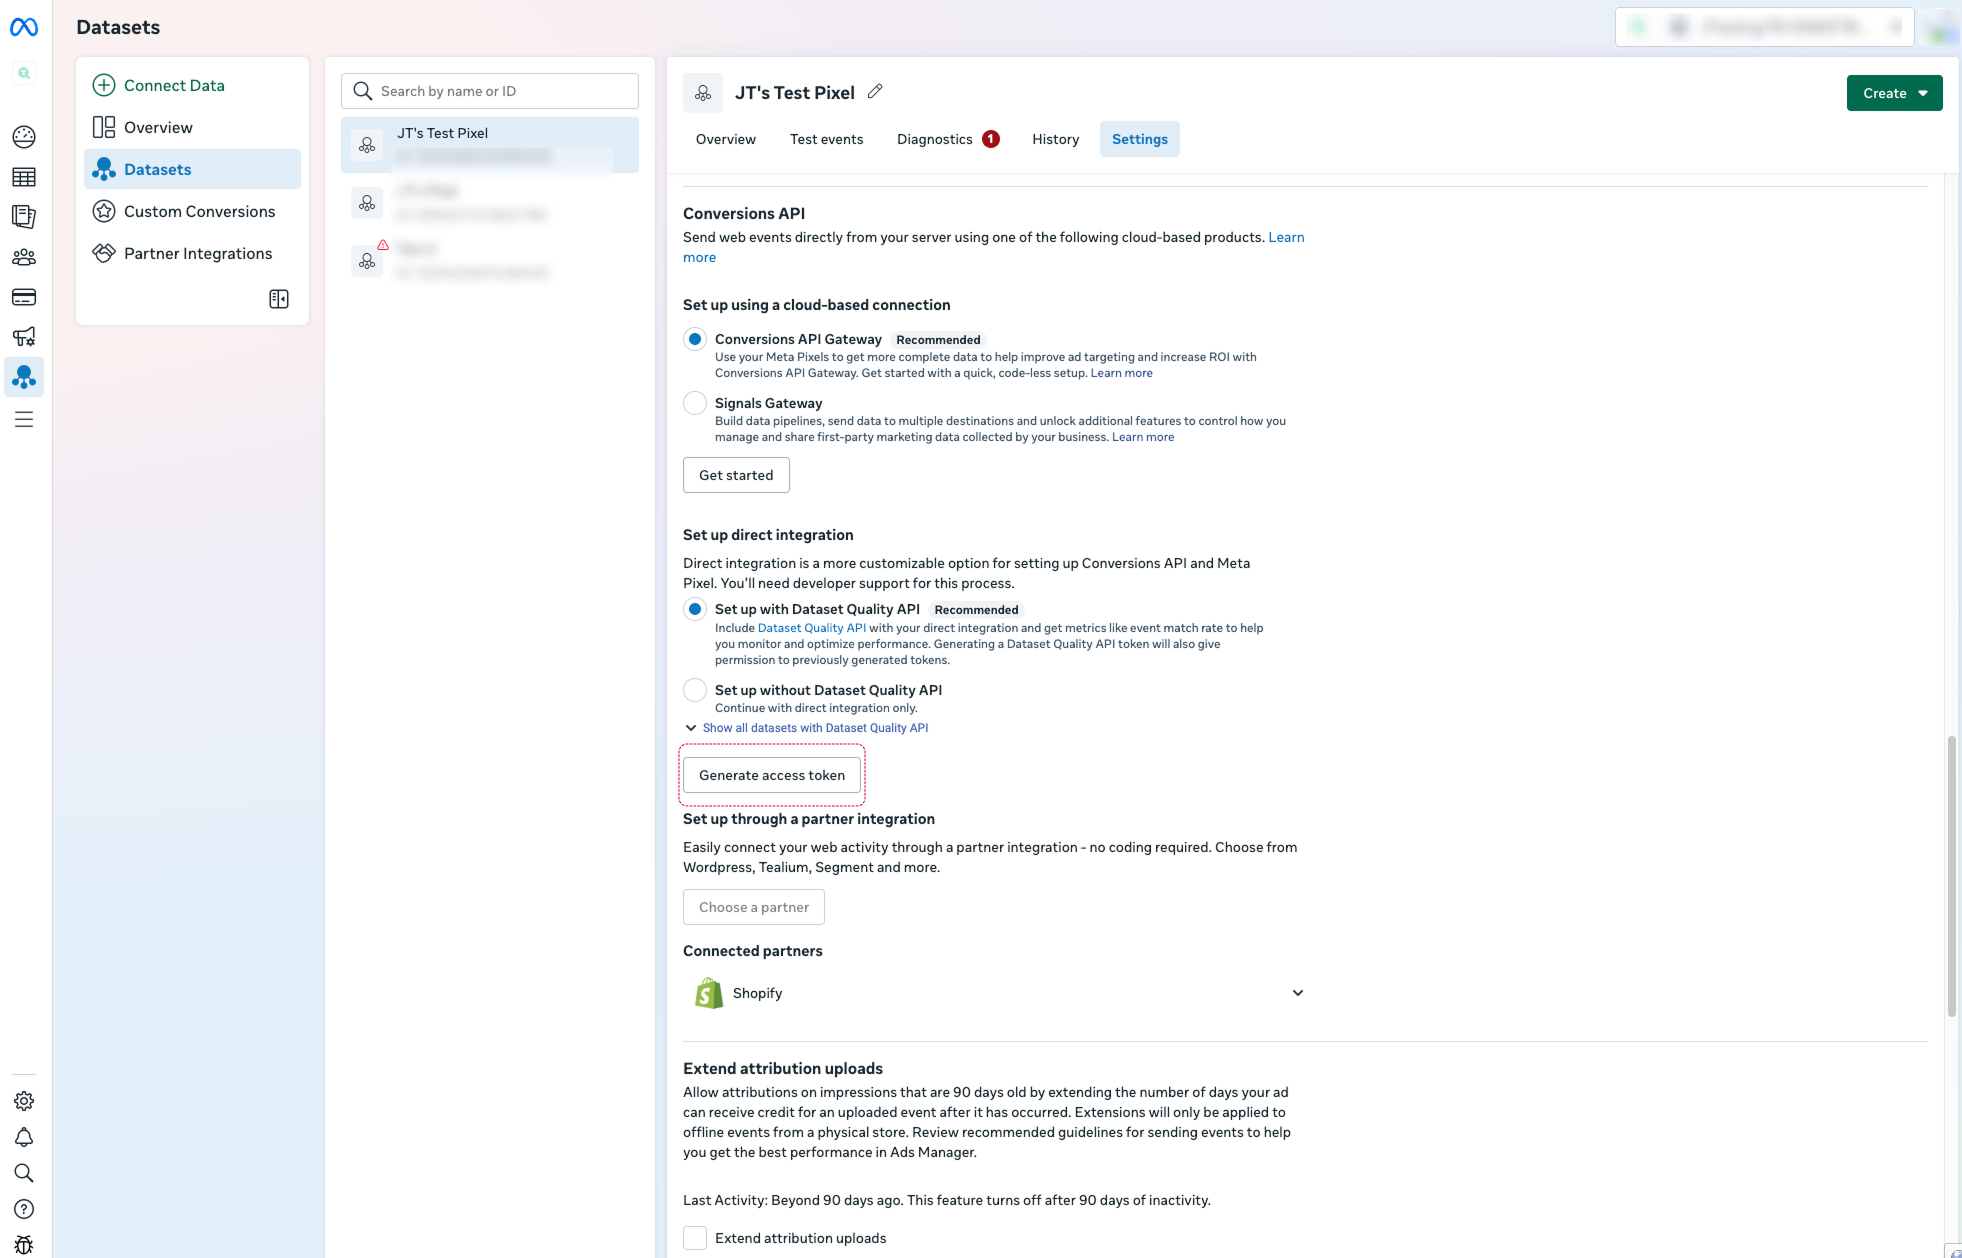
- Follow the previous step and scroll to the Conversions API section.
- Under Set up direct integration, click Generate access token.
- Copy the generated
Access Tokenand paste it into JTracking. - Test ID
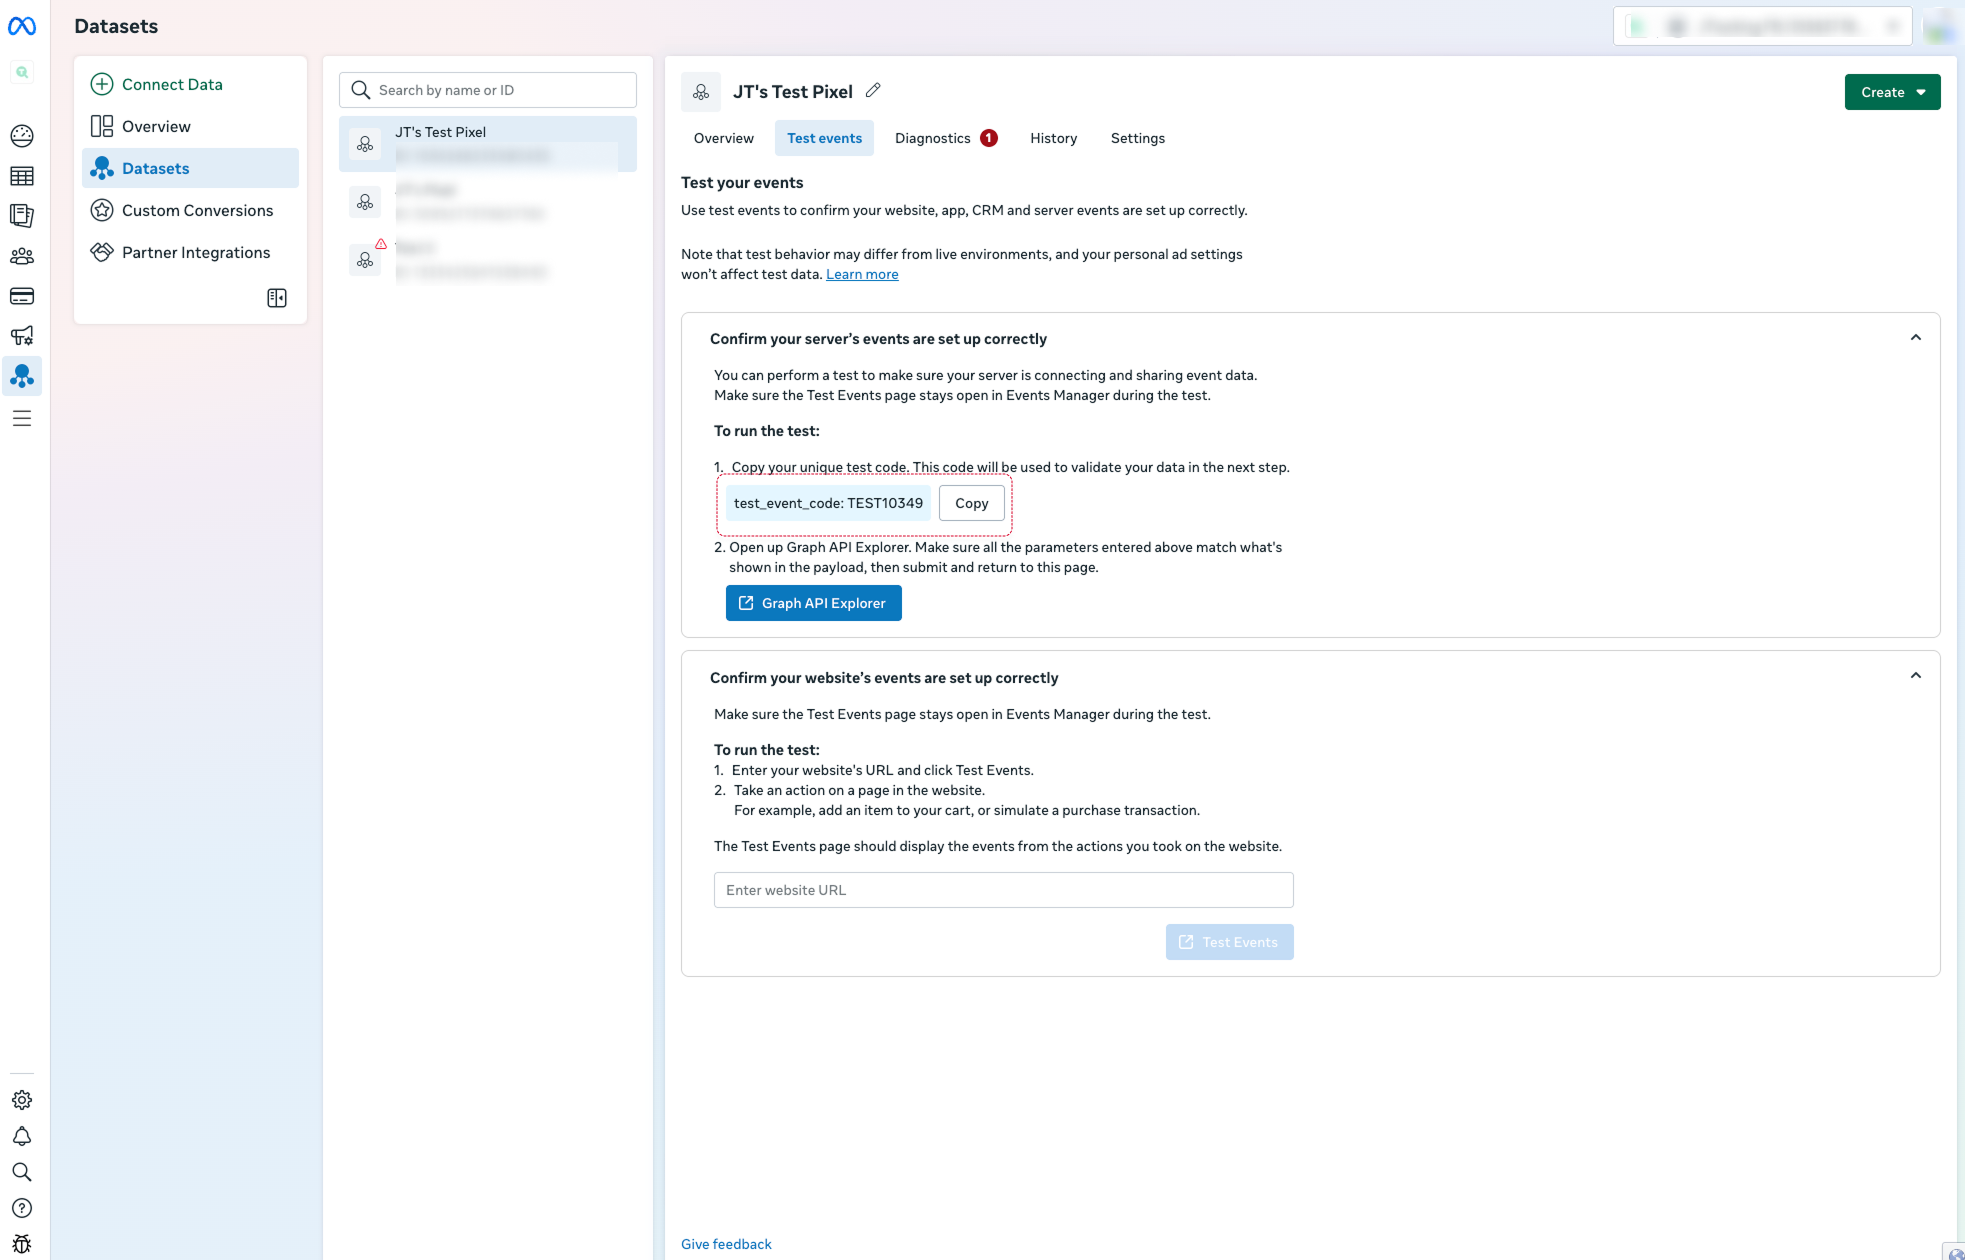
- In Meta Events Manager, open Test Events.
- In the Confirm your server’s events are set up correctly section, copy the
test_event_code
(e.g.TEST0349) and paste it into JTracking.
Note: When GTM is in Preview mode, events are sent to Meta as test events. After the container is submitted, events will be sent as live data. You don’t need to manually remove the Test Event ID.
Step 3. Click Save, and the configuration will be saved and the integration will be connected
Once connected:
- JTracking will generate Meta-related GTM configurations (tags, triggers, variables)
- These configurations will be deployed to your GTM workspace when you submit Deploy
- No data is sent to Meta until the GTM deployment is submitted
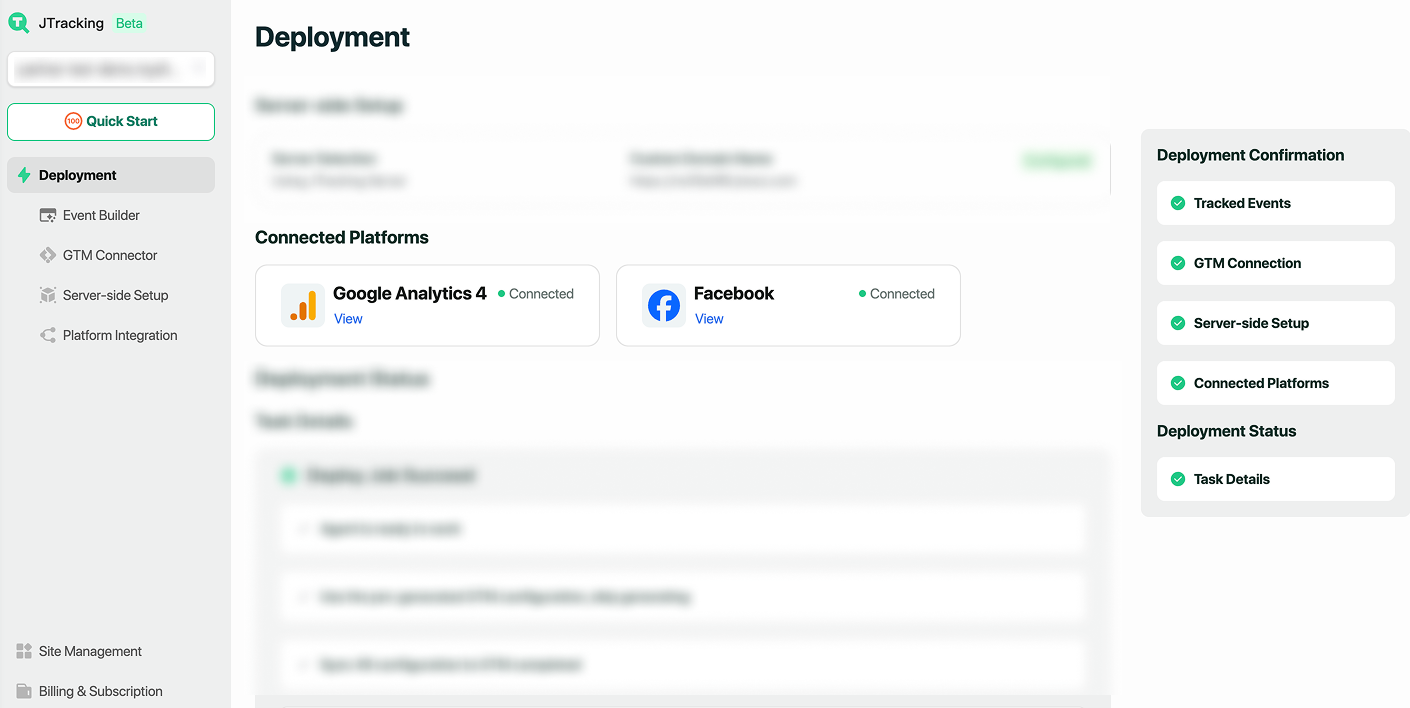
Optional step. Go to Deployment/Connected Platforms and open Facebook connector
You can review the list of events that will be sent to Meta.
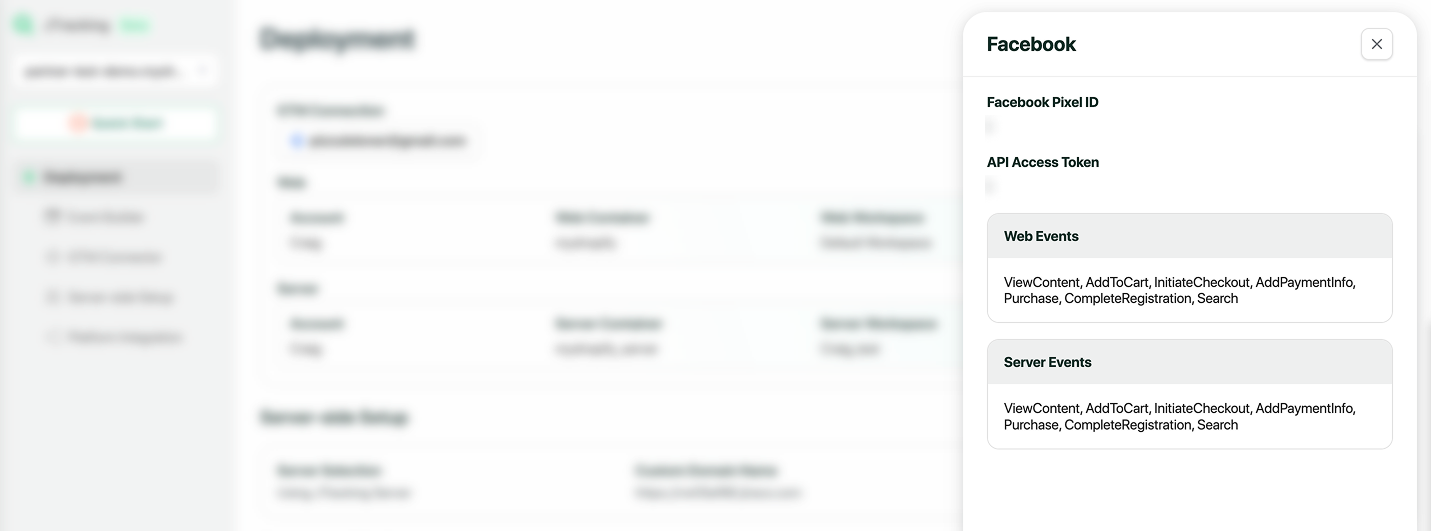
- All events are designed according to Meta’s standard event specifications
- The event names and parameters follow Meta’s recommended schema for Pixel and Conversions API