Getting Started with JTracking: From URL to GTM in 30 minutes
How to Instantly Generate a Tracking Plan and Deploy to GTM with One Click
This guide is for first-time JTracking users who want to quickly understand how to use our AI agent to generate a GA4 Event Tracking Plan and sync it directly to Google Tag Manager (GTM)—without the usual manual hassle.
We’ll walk you through the process step-by-step and answer common concerns like data security and whether JTracking will interfere with your existing GTM setup (spoiler: it won’t!).
Part 1: Generate Your Tracking Plan with JTracking
1. Enter your website URL
On the homepage of JTracking.ai, simply paste in the URL of the website you want to analyze, and click “Try it for free.”

2. Log in with your Google account
You’ll be prompted to sign in with your Google account to access the JTracking dashboard.
3. Authorize access & launch the dashboard
Once you're logged in and authorized, you’ll be redirected to the JTracking Chat.
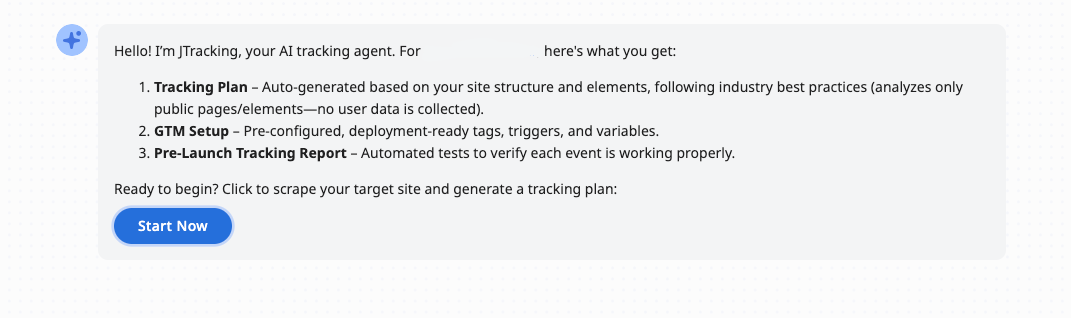
After click "Start Now", JTracking will immediately begin scrape the URL you entered—capturing key HTML structure, page elements, and screenshots to understand the layout and behavior of the page.
This process starts by generating a sitemap of the scanned website, which typically takes 1–3 minutes. Once the sitemap is ready, JTracking will begin analyzing the page content and structure to generate your Tracking Plan draft.

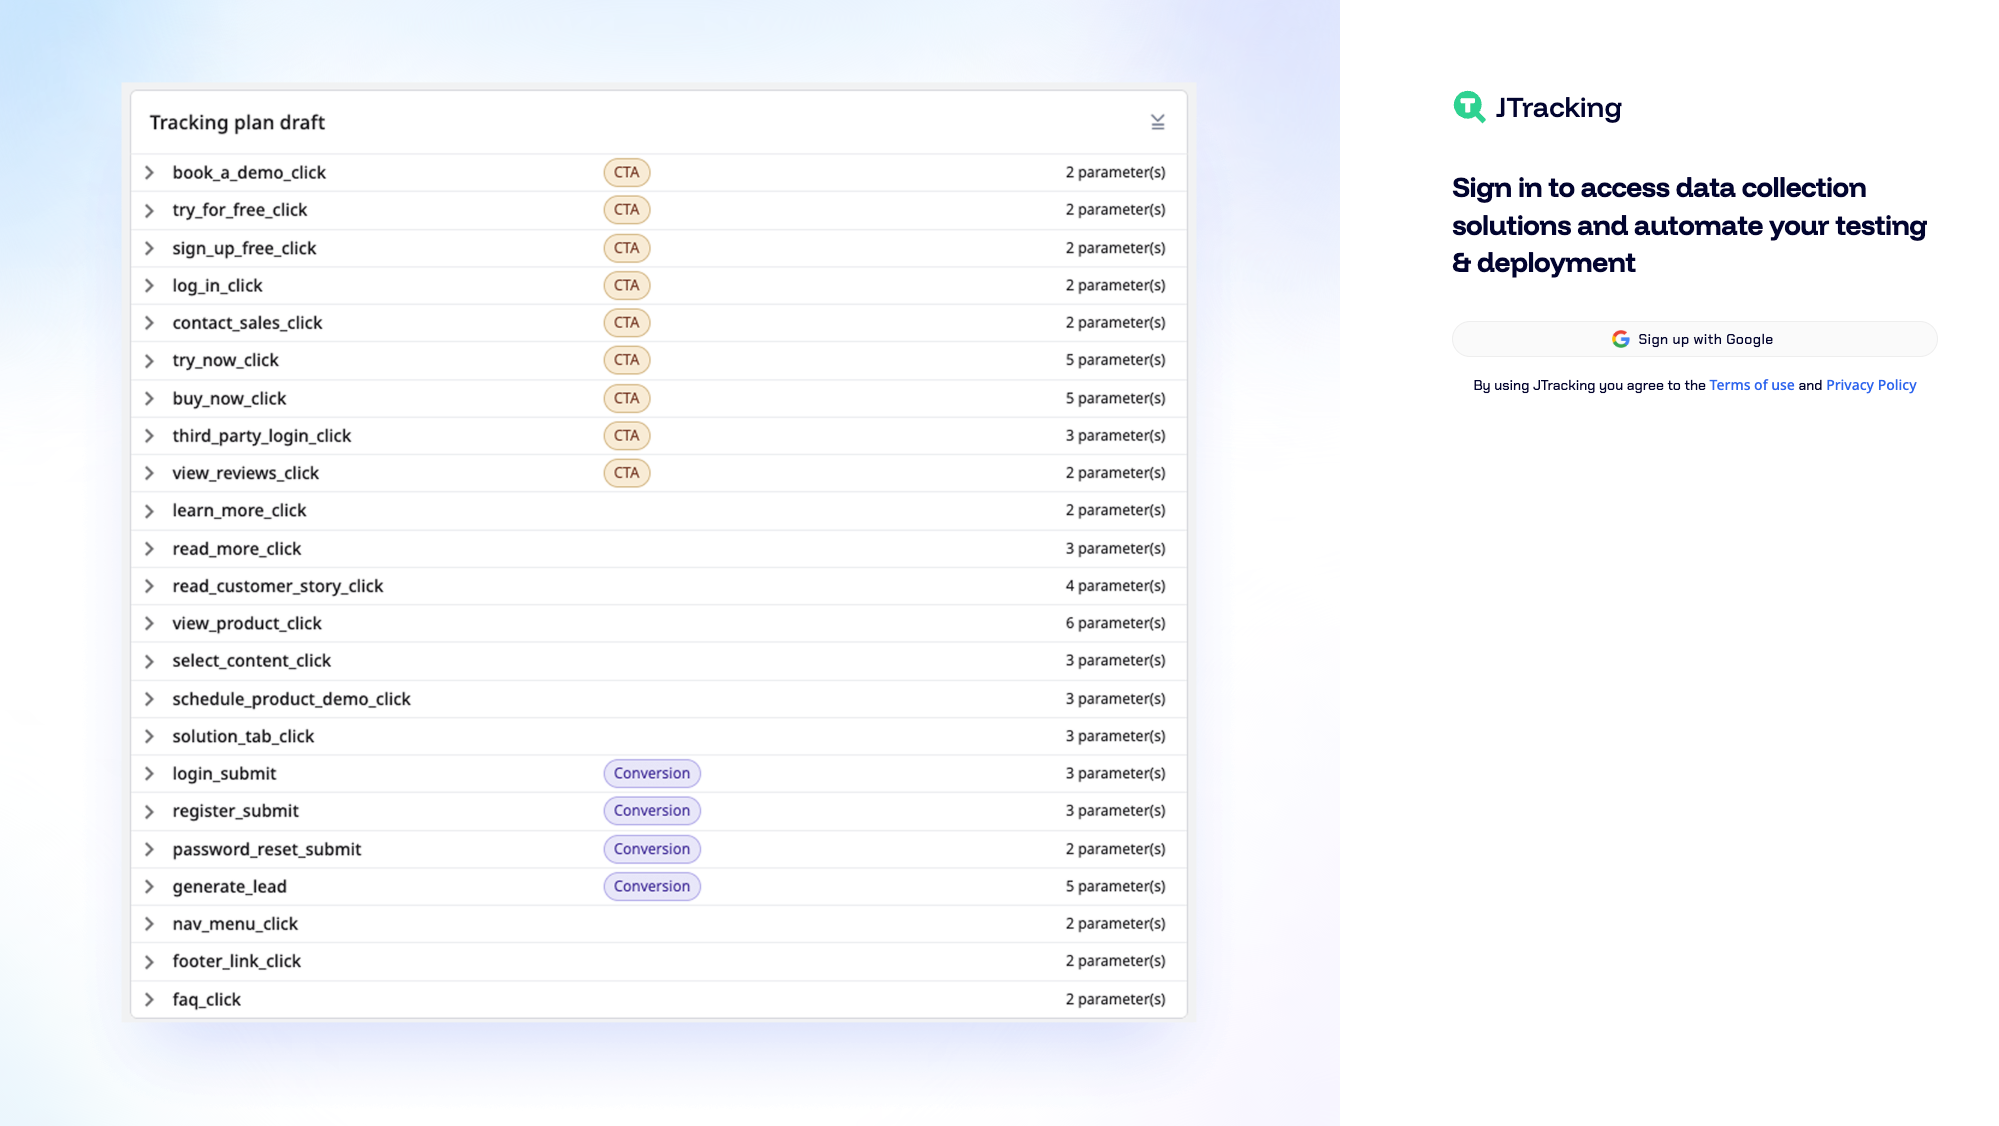
You now have a few options after your Tracking Plan draft is generated:
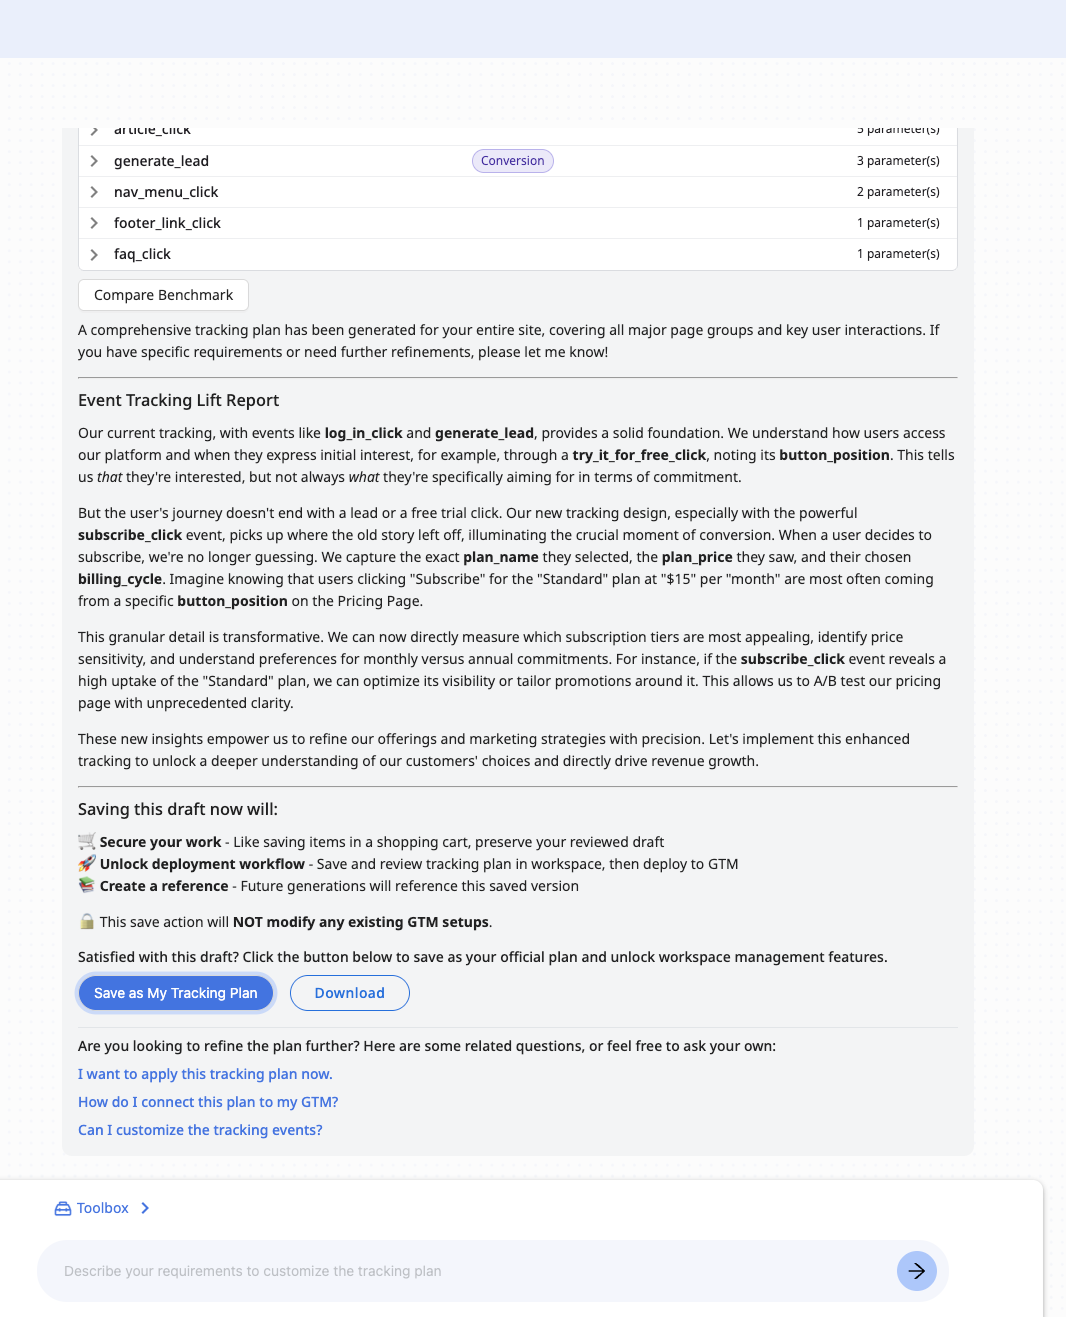
Click “Save as My Tracking Plan” to save the draft and unlock the editable workspace on the right. You’ll be able to fine-tune the event plan and collaborate with JTracking’s natural language interface to make improvements.
Click “Download” if you prefer to export the current Tracking Plan as an Excel file for offline use, documentation, or client handoff.
Explore the “Event Tracking Lift Report” module to see how this new tracking plan compares with your existing GTM setup. This report helps quantify what additional business insights the new plan could unlock—making it easier to communicate value to your team or clients.
Review the built-in guidance module (shown below the plan), which explains the purpose and impact of saving or updating your Tracking Plan. Especially if it’s your first time using JTracking, this guide helps you understand what happens next and how to confidently move forward.
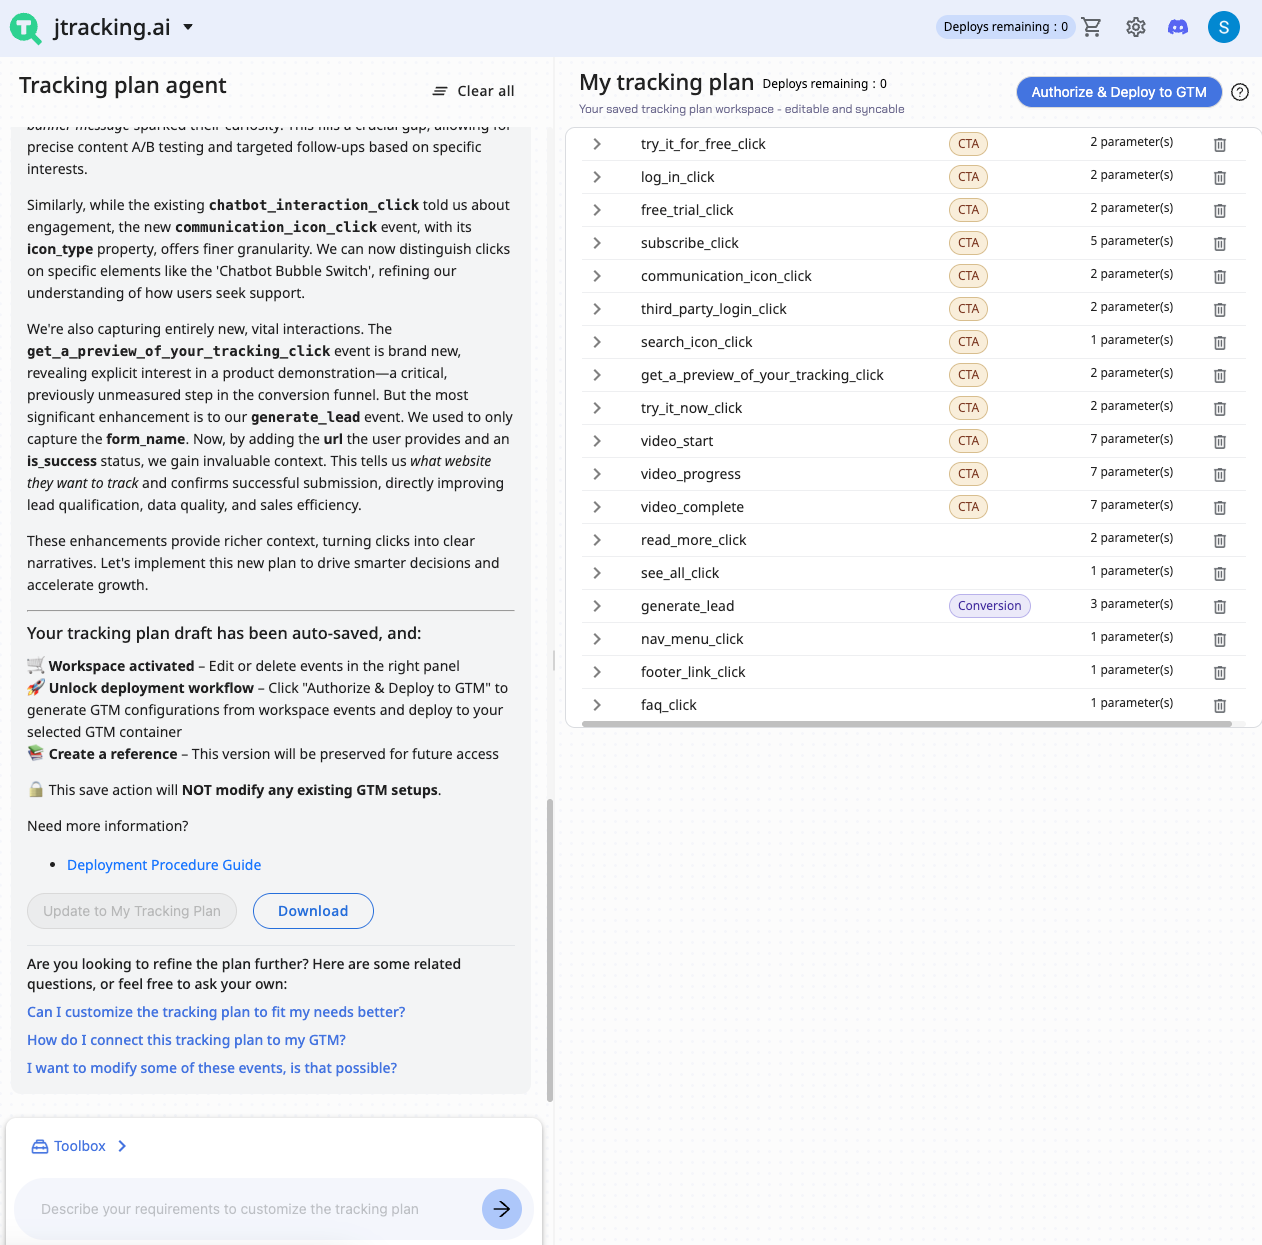
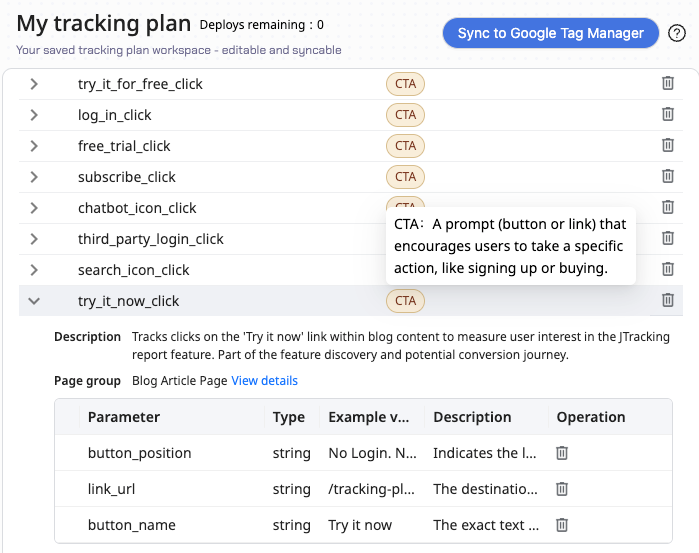
4. Review and refine in the Workspace
On the right-hand side, you’ll see the full editable Tracking Plan. Each line item is clickable and synced to the underlying page structure.
If you want to improve or tweak the plan, just use the AI chat on the left side. You can interact with JTracking using plain natural language (e.g., “Track all primary CTA buttons on this page” or “Add scroll tracking for product sections”).
After your changes, click “Update to My Tracking Plan” to refresh your saved version in the workspace.
Part2: Deploy Your Tracking Plan to GTM
1. Ready to sync? Let’s deploy it
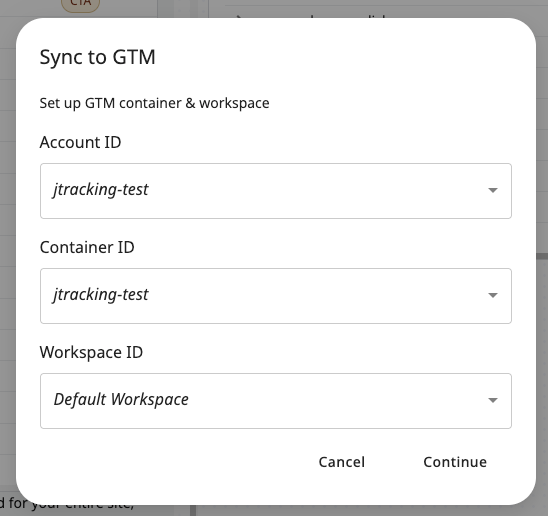
Once you're happy with the Tracking Plan in the workspace, you can deploy it to GTM by clicking “Sync to Google Tag Manager” in the top-right corner.
2. Choose where to deploy
In the pop-up dialog, you’ll be able to select:
The Account ID
The Container ID
And the Workspace ID
To stay organized, we recommend setting up a dedicated test container or workspace within GTM ahead of time—especially if you want to compare the JTracking setup with your current one before going live.
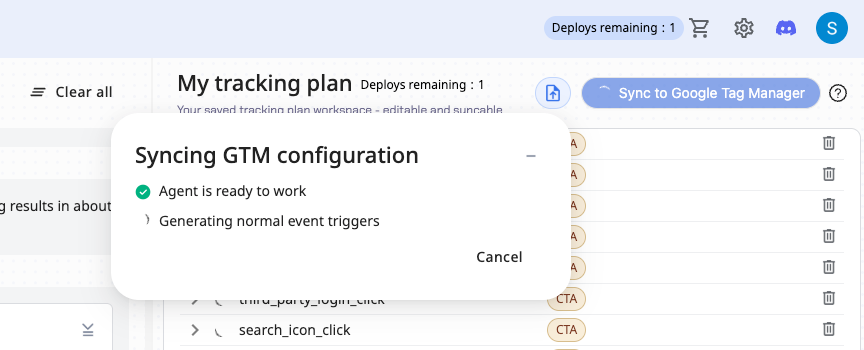
3. Sit Back While JTracking Syncs Your GTM Configuration
Once you click “Continue”, JTracking will begin syncing your Tracking Plan to the selected GTM container. Depending on the complexity of the website—number of pages, event types, and interactive elements—this process may take anywhere from a few minutes up to an hour.
You don’t need to wait on the page the whole time.
👉 We’ll send you an email notification both when the Tracking Plan is ready and when the GTM sync is complete, so you can go do other things in the meantime.
Behind the scenes, JTracking is setting up all relevant GTM tags, triggers, and variables based on your approved plan—ready for review when you return.
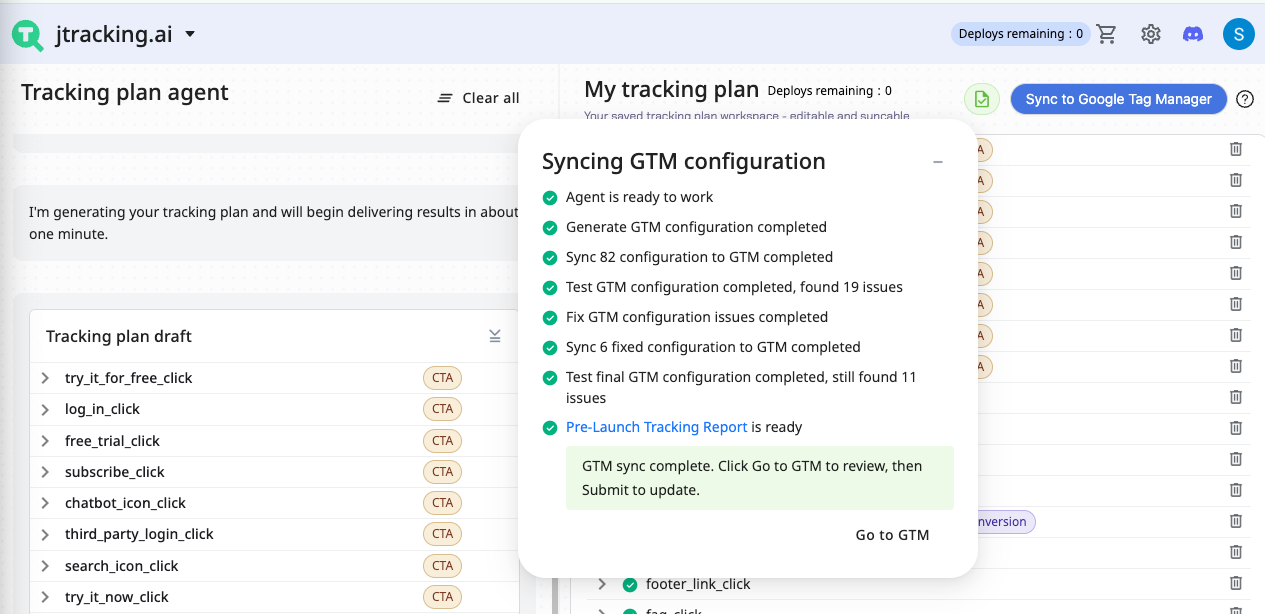
Before jumping into GTM, you can also click “Pre-Launch Tracking Report” in JTracking to preview and verify the key tracking points across your site. This gives you a high-level overview to confirm everything looks correct before moving forward.
4. Preview and Validate Before You Publish
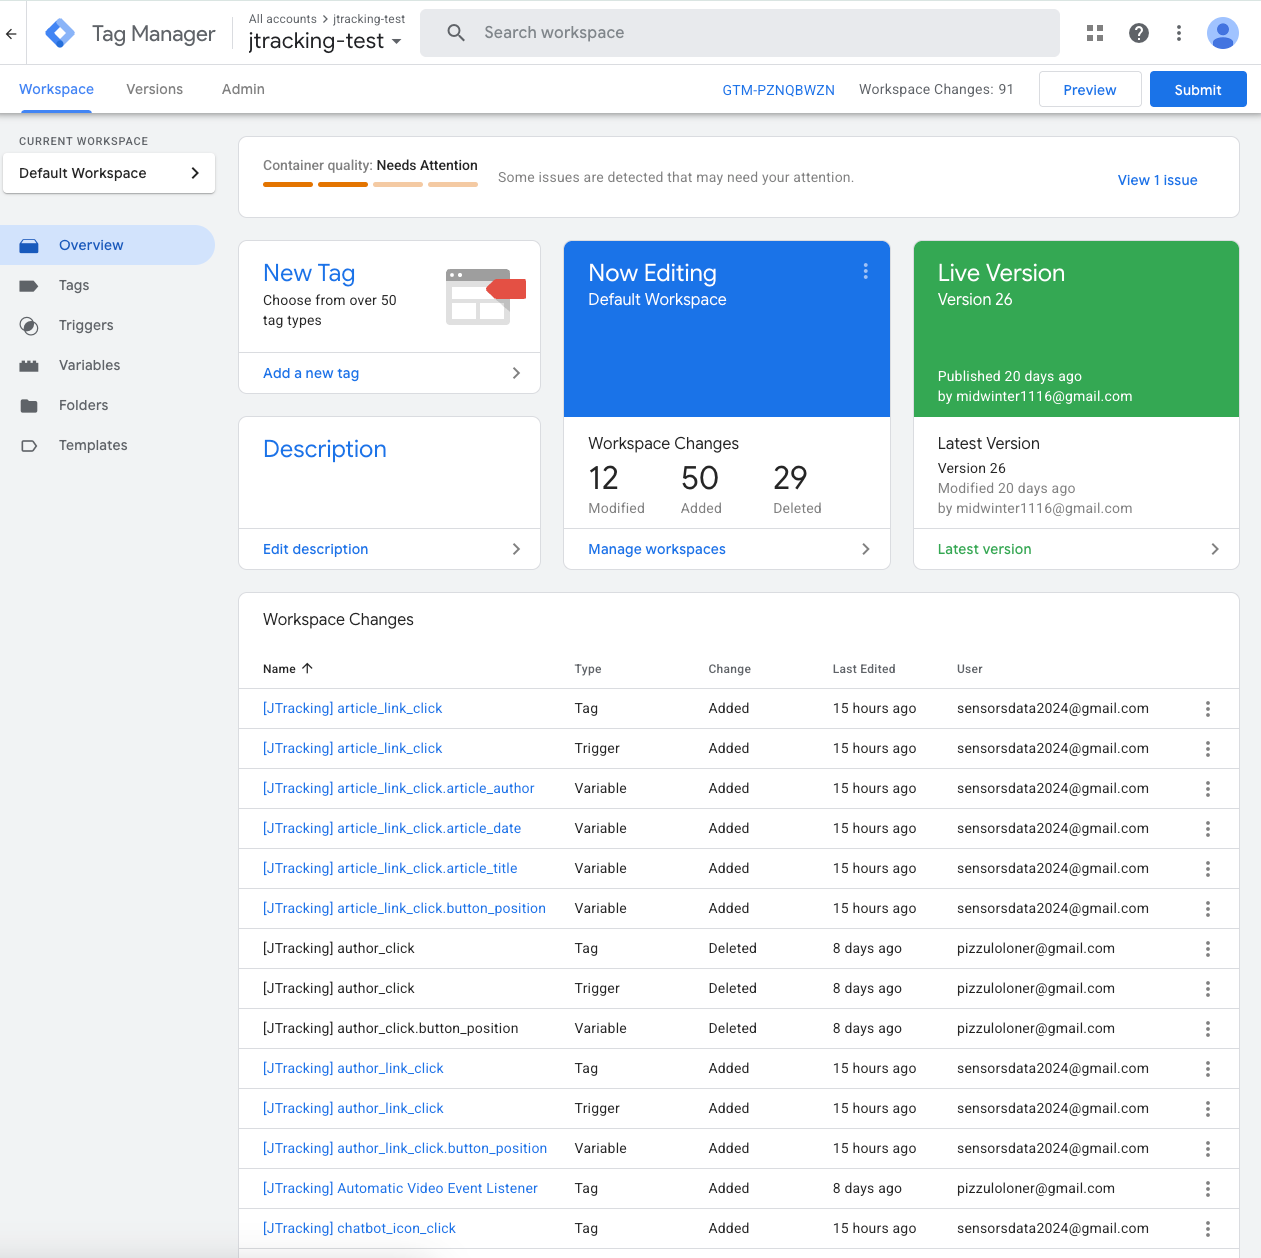
After a few minutes, the syncing process will complete, and you’ll be redirected to your Google Tag Manager workspace.
JTracking will have already created everything for you—based on your customized Tracking Plan—including:
A clear Overview.
All necessary Tags, Triggers, and Variables.
No manual setup required.
🔒 Important note: Nothing is live yet.
What you’re seeing is a preview-ready configuration, not a published one. You can click “Preview” in the top right to test and validate everything in real time.
None of the changes will go live until you explicitly click “Submit” in GTM. This means your existing GA4/GTM setup will remain untouched until you’re fully ready—so you can explore and adjust with full peace of mind.
Clear Labeling, Safe Testing, No Data Risk
All events generated by JTracking are clearly labeled with the “JTracking” prefix. This makes them easy to identify within your GTM workspace, so you can review, adjust, or remove them as needed—without any confusion.
Most importantly: none of the tracking events or configurations will be sent to GA4 until you manually hit “Submit” in GTM.
This means you’re free to experiment with multiple setups, test different plans for different clients, and refine your tracking approach—all without worrying about data leakage or cross-client contamination.
It’s safe, isolated, and under your control.
👉 Give it a try at jtracking.ai and start building smarter tracking plans today.